Walkthrough
This is the official walkthrough for Giftscop.
Beginning
Before Playing
We strongly recommend watching the original Petscop videos before playing Giftscop. If you play Giftscop without having watched the original series, you will be missing out on a lot of important information. In other words, Giftscop is NOT a substitute for the original series. This walkthrough focuses primarily on progressing through the game itself, not story content, and it skips over several optional parts of the game.
While this walkthrough describes how to complete the game and experience events in the same order as the original series shows, it is possible to complete Giftscop differently than this walkthrough describes, by taking different paths, or completing events in a different order. The purpose of this walkthrough is mainly to provide a resource for those who want to reach the end of the game, but do not know how, typically due to the ambiguous nature of the original videos.
In Giftscop, we've implemented things according to our own interpretations of how the game functions; some parts of the game shown in the videos function in ways that are very ambiguous. It's possible that our interpretations are different from what the original series intended, and we do not intend to present our implementations as the "correct" interpretation.
Additionally, parts of the game can be very frustrating or tedious. We believe that this is how the game in the video functions, which Giftscop reflects. If you do not want to experience this, we recommend watching the original Petscop series instead.
This walkthrough will assume that you're using the most recent version of Giftscop, and is written to be applicable to all platforms (including PlayStation, Windows and macOS). If you're using an older build, certain features may be unfinished or missing entirely. The most recent build may be found on the downloads page.
Setup
If it is your first time playing, you will be prompted to select a layout for the controls.
If you are playing Giftscop on Windows or macOS, the keyboard controls should be thought of as similar to how they would work in a PlayStation emulator: Keys are set to control buttons on a virtual gamepad.
When prompted to press a button, it is written to refer to PlayStation buttons, not keys on your keyboard. Usually, this is unambiguous, but it can be confusing when the d-pad (


 ) or
) or  button is involved. Upon selecting a layout, the game will start.
After the Garalina logo, the title screen will load. From here, you may create a new save file. When the file is loaded, you will be taken to the Gift Plane, and the game will begin.
Whenever you want to save your game and return to the title screen, just open the pause menu via  , select the quit game option, and then select save and quit.
The Gift Plane
After loading your file, you may control the player character (called guardian) using .
There is a pink sign that provides information about The Gift Plane. When you approach it, a ? icon will appear and you may press to read it.
Enter the building to the right of the sign to proceed.
Even Care
The first level is called Even Care.
Throughout Even Care, you'll find collectable objects called pieces. When you collect a piece, a counter will appear on the top left corner of the screen. You may also view your piece count in the pause menu, which can be opened with . Be sure to collect all of the pieces you find, as they will become important later in the game and some are permanently missable.
You may also find 5 Pets within Even Care. Each of which may optionally be caught by completing a short puzzle. After catching a pet, you may read a description of them in the pause menu. Their rooms are described below:
Amber's room contains two cage doors on either side, with Amber inside one of them. Beside each door is a lever to open or close it.
Pen's room is South of Amber's room. It contains a large musical keyboard and a treadmill connected to a sign displaying a number.
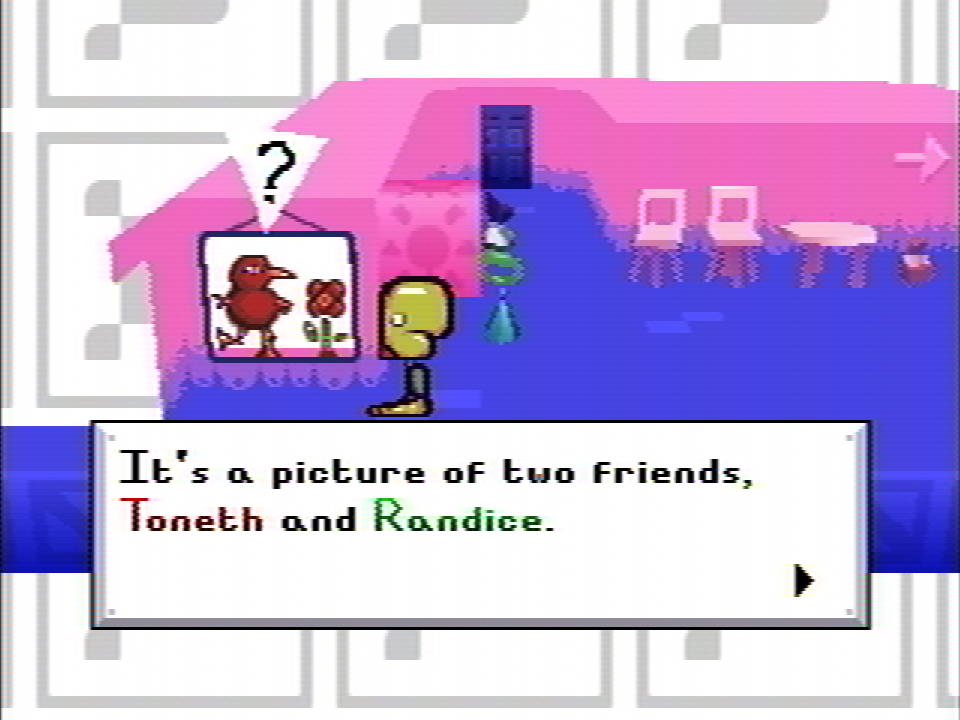
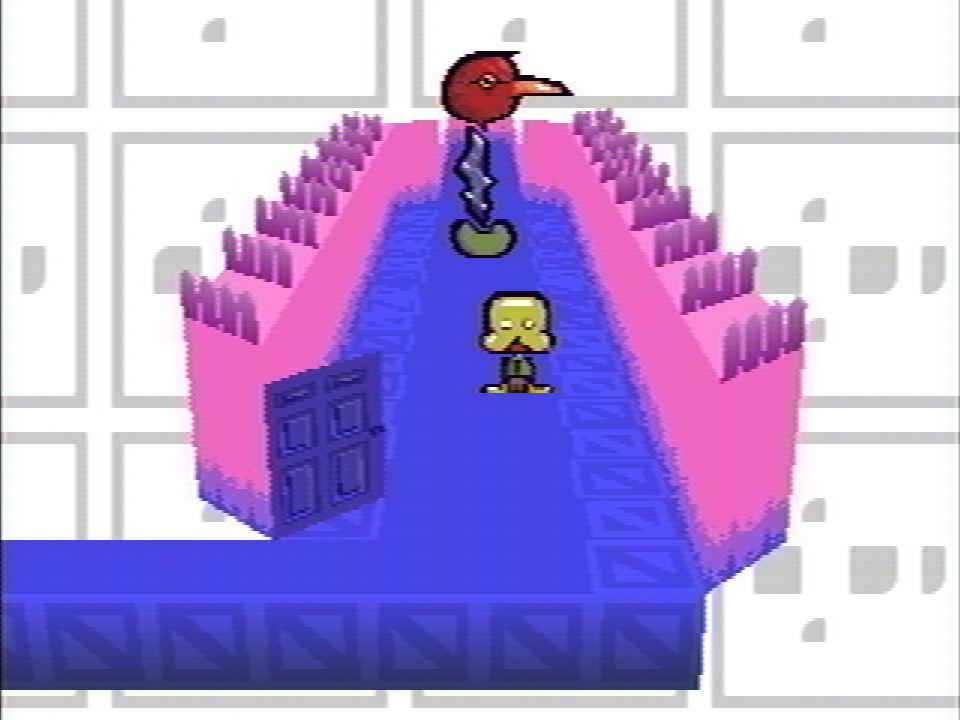
Randice & Wavey's is beyond Pen's room. It contains two areas of grass, an umbrella and a bucket which may be pushed by the guardian. It is possible for the bucket to get stuck in a corner, but you may leave the room and come back to reset it.
Roneth's room is to the right of Amber's room. Roneth will flee when you approach him.
Leaving Even Care
When you're ready, proceed to Roneth's room and enter the code from the note that came with the game:
I WALKED DOWNSTAIRS AND WHEN I GOT TO THE BOTTOM, INSTEAD OF PROCEEDING, I TURNED THE RIGHT AND BECAME A SHADOW MONSTER MAN
6/13/97
For you:
Please go to my website on the sticker and also go to roneth's room and press start and press down down down down down right start
Keep in mind, it is referring to PlayStation controller buttons, NOT keys on your keyboard: "down" and "right" ( and ) may not be controlled by the arrow keys, depending on which controls layout you selected. The PlayStation buttons are as follows:
When the code is entered, a sound will play and the music will stop. Next, leave Even Care through the way you came in.
If the code does not seem to work, chances are that you entered it incorrectly. We have received numerous bug reports about this and in every instance it was entered incorrectly, or ocassionally there was an issue with the reporter's controls configuration.
If you haven't done so already, be sure to collect all of the pieces before you leave, because you won't be able to come back later. You should have 55 pieces before leaving.
The Newmaker Plane
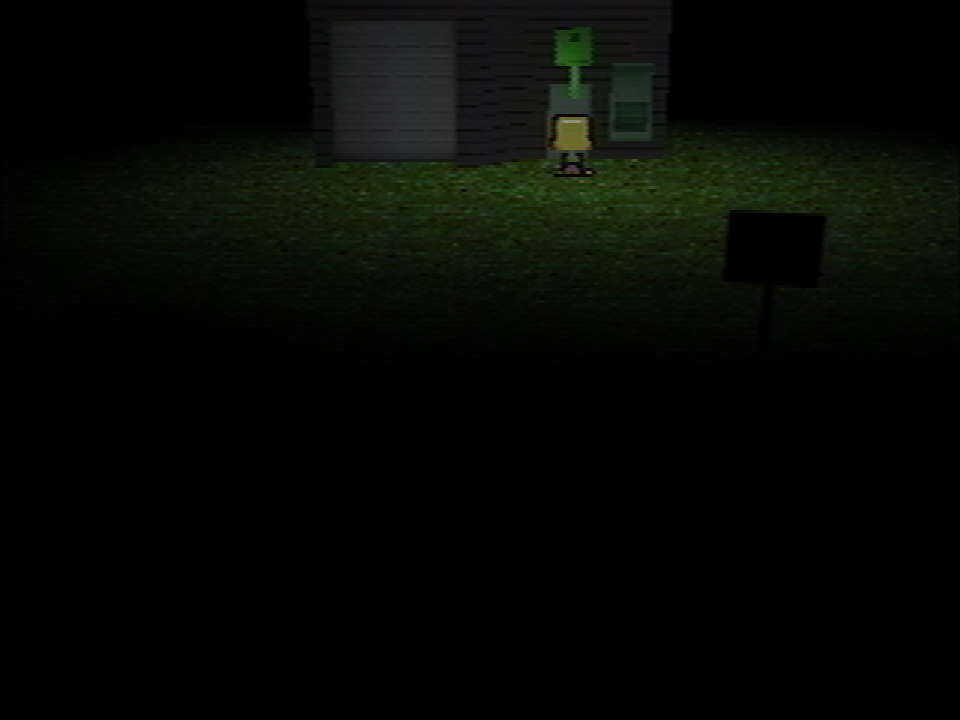
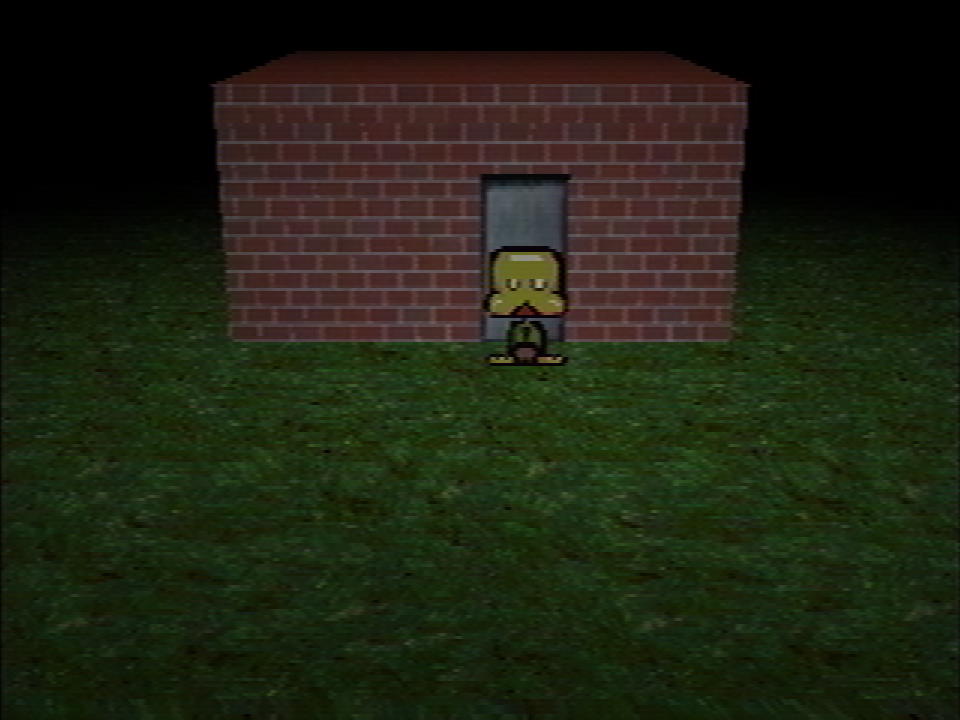 Upon leaving, you'll appear in a dark grassy field, next to a small brick building.
Be very careful not to get lost. This room goes on forever, and there are very few landmarks.
To proceed, walk diagonally Southeast (down-right) from the brick building for approximately 30 seconds, and you will reach a closed wooden door. It will open automatically after a couple of minutes. NOTE: The location of this door, and why it opens, are not clearly shown within the original series. These are subject to change in future versions of Giftscop.
The following portion of the game contains numerous rooms which may be visited in whatever order you want. For this walkthrough, we'll first briefly explore all of the accessible rooms, and then focus on more specific events within the important rooms.
Exploration
After walking through the door, you'll appear in the cellar. Be sure to collect the 8 pieces in the room, and then enter the passage on the left.
After the cellar is a concrete hallway. Collect the 27 pieces here, and proceed left.
Next, you'll appear in a small office. You may interact with the phone and the corkboard on the right wall. Collect the 3 pieces and continue left.
The next room is another concrete hallway, containing 44 pieces. To move on to the next room, proceed upwards and to the right.
After that, you'll appear in a large room with a road in the middle. You may collect 36 pieces here. From this room, you may either take the upwards passage to the right of the road, or the passage on the right side of the room.
If you take the upwards passage, you'll appear in a grassy room containing a grave and a shed, both with faces on them. This room contains 15 pieces. You may interact with the grave to view an epitaph. The shed contains two entrances: a regular pathway on the left, and a basement door on the right.
If you walk behind the right side of the shed, you'll enter a narrow tunnel. At the end of this tunnel, you can either go left or right.
The left path will lead to a narrow horizontal area. There are 6 pieces in this room, and a doorway to the left.

The door will lead to a large interior room. To the right, you'll find two important things you can interact with: A red object which will allow you to ask a question, and a large screen displaying a windmill. Be sure to collect all of the 10 pieces in the room before leaving. If you interact with the windmill screen, the red tool will prompt you to keep watching as soon as you look away. You may optionally watch the windmill for several hours like in Petscop 6 to see something happen, but this is NOT required.
If you leave the room with the windmill screen and head right, you'll find another narrow horizontal area. This room contains 8 pieces, and two entrances. The entrance on the left cannot be entered.
If you walk into the right entrance, you'll find an interior hallway, leading to another room. This room has a large mirror in the center, and you can see another character reflecting your movements on the other side. "Quitter's room" is written on the floor. When you're ready to move on, walk back out the way you came.
If you walk further to the right, the path will eventually turn forward, and will lead to a staircase. This staircase will take you back to the dark grass field. Right now there isn't anything you need to do here, but you may want to return here at a later point. From here, you may return to the room with the road, and enter the passage on the right.
The right passage leads to a large horizontal hallway. The text "good grief and alas" appears on the wall. There are 19 pieces to collect in this room. On the right you can find a red brick building with an open door.
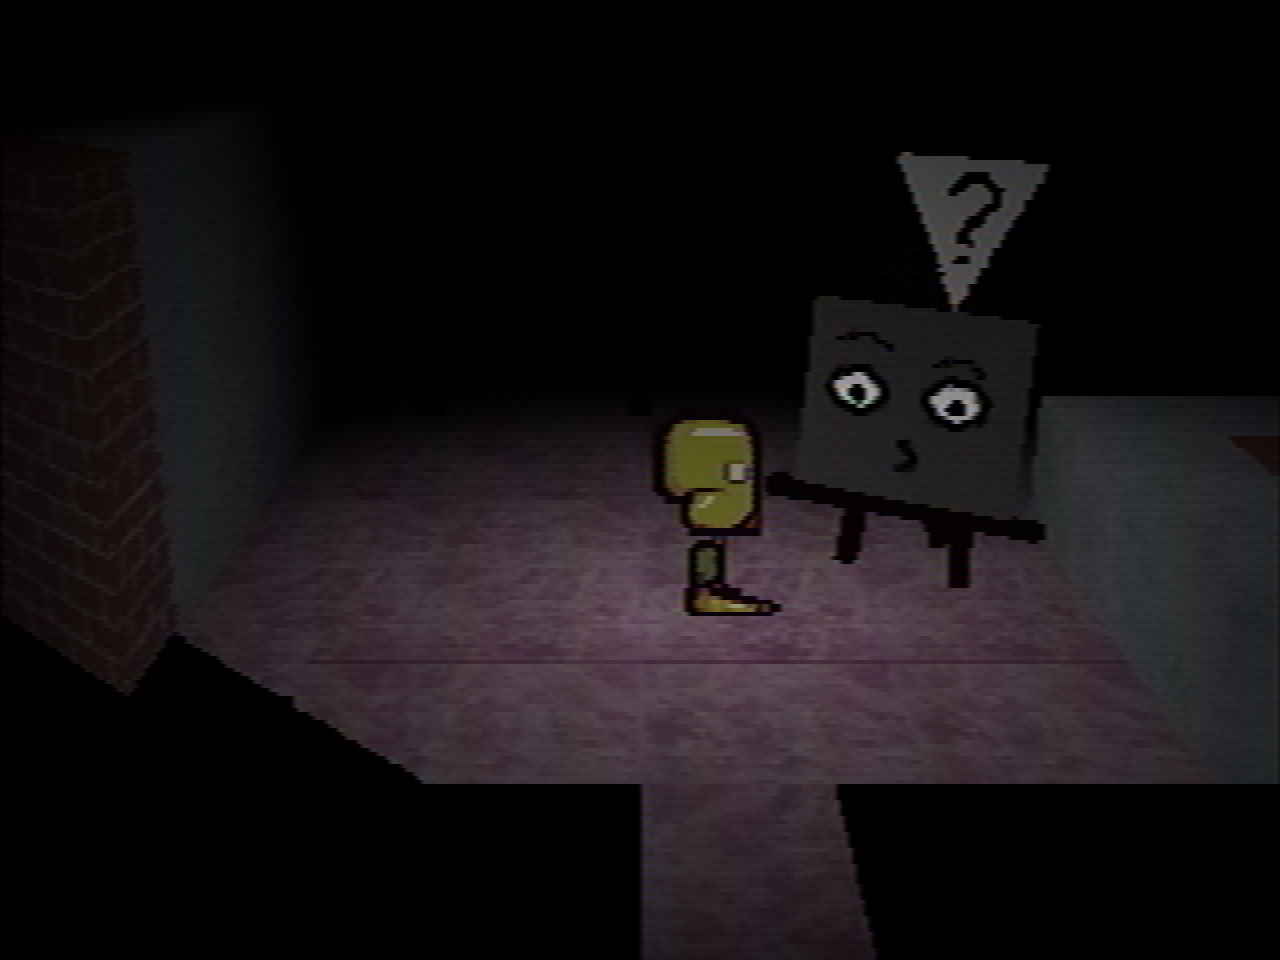
Inside of the building is an easel which, when interacted with, will open a menu that allows you to select various facial features, including eyes, eyebrows, a nose, and distances between these features. If you decide to enter a face, the room will begin shaking. After about ten minutes have passed, the shaking will stop, and you'll be able to enter the passage in the upper right area of the room. Right now however, you don't need to enter a face or visit the room through the passage if you don't want to.
After exploring all of the rooms mentioned above, you should have at least 231 pieces. We'll now examine more specific events within these rooms:
Entering The Windmill
In the room with the grave and shed, proceed into the shed's basement door, but don't go far enough to actually load the next room. Instead, proceed right. If you do this correctly, you should clip out of the doorway, and onto the ground next to the shed, and the guardian will now be a dark silhouette.
Enter the tunnel behind the shed, and proceed right until you reach the staircase then proceed upwards.
In the grass field, proceed left from the door for approximately 7 seconds to reach the camera observing the windmill. Then, proceed upwards for approximately 6 seconds to reach the windmill itself. The windmill can be entered from the back.
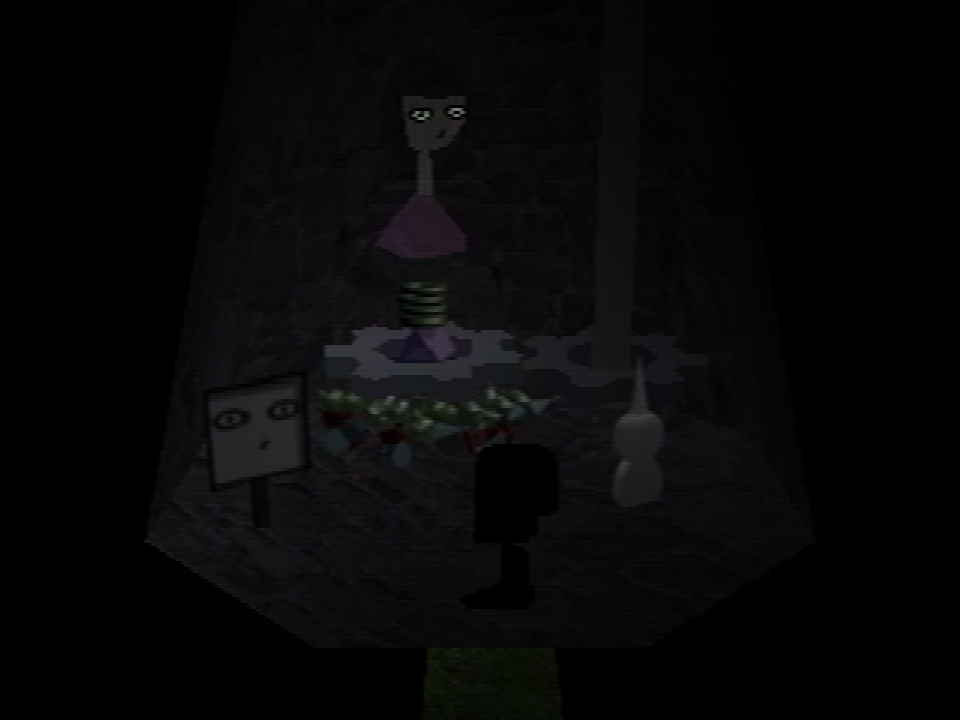
Inside, there is a sign with a face on it, a white tool, a spinning figure, and some pieces stuck inside of the windmill's gears.
Use the white tool to collect the 50 pieces. Afterwards, the figure will be gone, and the windmill will begin rumbling and turning the opposite direction.
The silhouette effect won't be used for anything else for a while, and it may be easier to see what you're doing without the effect. To go back to normal, you may enter the shed's basement door again, and leave normally.
Face from The Windmill
Return to the brick building in the area with "good grief and alas" on the wall. The face from inside the windmill can be entered into the easel here.
When describing how to enter faces into the easel, this walkthrough will provide a sequence of numbers corresponding to options within the easel menu: Zero corresponds to the top option, one corresponds to the next option down, and so on. Using this format, the face from the windmill is 1 1 0 0 1 0 0 2 0 0 2.
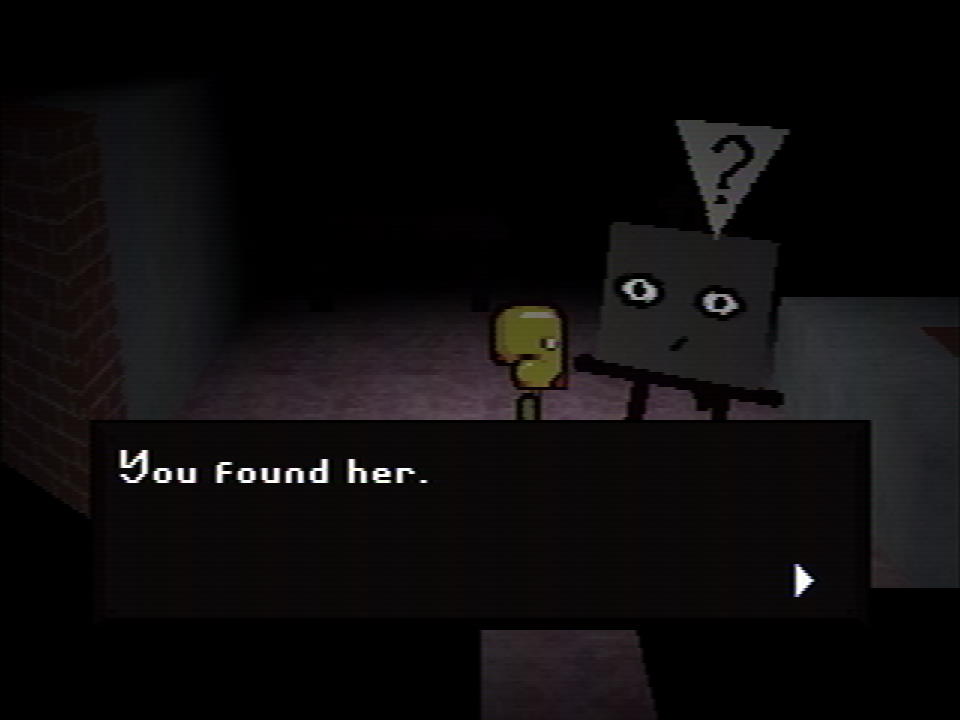
When the face is entered correctly, a text box will open:
You found her.
You may visit her room.
The room will shake for about ten minutes. After this, enter the passage in the upper right corner. You'll appear in a bedroom, with a note on the wall. When you're ready to move on, enter the passage on the right, behind the table.
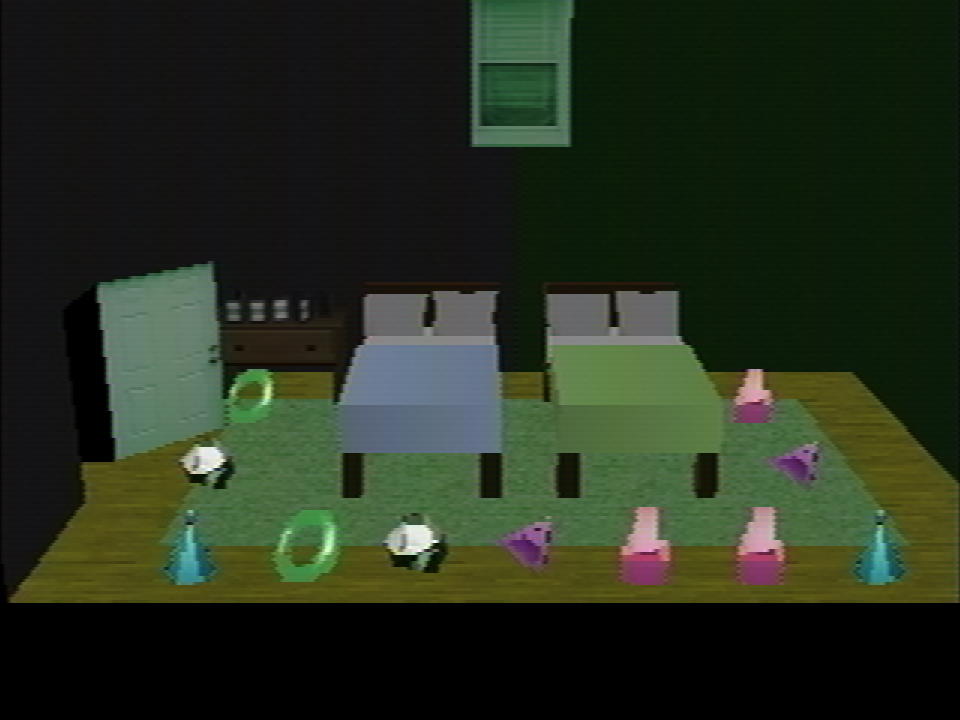
The next room is very dark at first, and can even be mistaken for a black screen. Just walk forwards and eventually you'll be able to see. There are 36 pieces here. There are two large gift boxes.
Be sure to open the box on the right, as it contains a green key which will be important later. After exploring this room, you should have at least 317 pieces.
NOTE: It is not possible to leave this room through the way you came in. If you attempt to walk back out that way, nothing will happen. Due to the lighting in this room, it is easy to mistake this for a crash, as the screen will become completely black when you attempt to leave this way. To leave, you must proceed forwards, as described below.
Approach the left wall, and begin walking downwards. There is a small white structure down and left from the area with the gift boxes. It's difficult to see, but once you find it, you may enter through the front.
Inside is a small room containing a third gift box. Upon opening it, the camera will move inside, and a chorus sound will play for several seconds. You'll appear on the grass field again. Walk forward to find the same brick building from earlier. Now, the door is open.
Odd Care
Through the brick building door, you can return to Even Care. Several things are different however. This alternate version of Even Care isn't given an official name within the original series, but fans sometimes call it as "Odd Care". As you explore, be sure to collect the 27 new pieces here.
In Amber's room, the door to Roneth's room is closed, and the right cage is already open. You should open both cages before leaving.
In Pen's room, the keyboard is missing, and the door to Wavey & Randice's room is closed. You may use the treadmill to set the number to -1, if you intend to catch Care NLM like in Petscop 9. If you plucked any of the petals from the flower in the shed, you may recognize the sound that now plays when you use the treadmill to change the number.
When you're done, try and exit through the way you came in. The door in the hallway with the two signs may close, and the game will freeze, as it does in the original series.
After the game freezes, just close the game, reopen it and load you save file. Crashes will cause the game save some of what you did, however a "PANICSV possible corruption" label will appear on your file.
When you reload the file, enter the gift box again. If you want to go back to Odd Care, enter the brick building. Otherwise, if you want to move on, walk back to the cellar door. The cellar door can again be found by walking diagonally Southeast (down-right) from the brick building.
By the time you've finished exploring Odd Care, you should have at least 344 pieces.
Freeing Tiara
After opening both of Amber's cages in Odd Care, you can proceed to the tunnel behind the shed, and take the right path. Now, both the left and right entrances are accessible. The left entrance will allow you to access the left side of the quitter's room.
After entering the left side, go to the right side. The character who previously reflected your movements should now be gone.
The House
Finding The House
To reach the house, you will need to travel relatively far across the grass field. It's very easy to get lost here; we recommend saving your game before leaving any known landmarks, so you can reload your file if you get lost.
Proceed to the staircase right of the quitter's room entrance, and go up. Then, proceed left until you reach the camera, then walk forwards until you reach the windmill's location. The house is Northwest from this location, slightly more North than West. It's quite far, and will take a couple minutes to reach.
Along the way, you may (optionally) find the tire from Petscop 11.
 Eventually, you will find a road. On the road is a sign, which reads "This is a frozen house, captured three times, exactly as it was." The house can be found directly forward from this sign.
If you're having trouble finding the road, start from the windmill and walk directly left for approximately a minute, and then directly up for approximately 1 minute and 50 seconds. NOTE: It is very easy to mistakenly count too fast or too slow. If this happens, you may end up in the wrong location and become lost. We recommend using a stopwatch to ensure that you walk for the correct amount of time.
The door of the house will be closed, but you can use the green key to unlock it. After this, the door will open automatically after several minutes.
December 25th
Inside the house, you'll find people appearing and disappearing at various locations, along with a Christmas tree, two calendars and 21 pieces.
After some time has passed, text boxes will begin appearing. Afterwards, the door next to the calendars will open. Enter the door, and a short cutscene will play.
The door leads to the bathroom, which contains 3 pieces.
June 5th
When you leave the bathroom, the house will have changed: The people and Christmas decorations are gone, the calendars are different, and there is now a bucket.
The door to Care's room is now open, and there are several objects on the table next to the door, with pieces connected to them. There's also a note pinned on the wall next to where the Christmas tree was.
Optionally, you may catch Care A like in Petscop 11, by entering the closet as the in-game time approaches 6:15, observing Marvin's appearance at 6:15, and then using the ladder outside Care's window. The current in-game time is approximately 00:00 **.
Alarm
If you walk left on the road outside of the house, you'll find a teal tool, which moves left as you attempt to approach it, eventually moving upwards.
If you take the bucket outside of the house and onto the road, you can capture the tool by placing the bucket under the location where the tool moves upwards, and then backing away to cause the tool to descend into the bucket. The paint in the bucket will splash, coloring the tool black.
Bring it back to the house, and put it next to the table outside Care's door. The tool will collect 15 pieces from table, adding them to your piece count.
Note: You must do this before proceeding to the following section, as the pieces here will become inaccessible after completing the next section.
Painting The Walls
 In order to progress any further, you will need to enter the door in the lower right corner of the house. This door is closed, and you can't enter it directly.
Before proceeding, we strongly recommend watching Petscop 14 if you haven't already. It's where this happens in the original series, and it may be easier to understand by seeing it in a video, rather than just reading about it.
Be sure you've done everything you want to do at the house in its current state, as some things will become inaccessible afterwards.
In order to complete this part, you'll need to consider the game's recording system: When you play the game, your button inputs are recorded to a file, which may later be played as a demo if you wait at the title screen. During playback, some parts of the game may be different, causing the recording play out differently compared to the original session. One such difference is that the door you need to enter will be open during demo playback. With this is mind, you can load your save file, attempt to walk through the door, pretending it's open, and continue pressing buttons as if you were actually in the room. After you're done, save and quit, and the recording will be added to the rotation. When the recording plays, the door will be open, and it will actually enter the room.
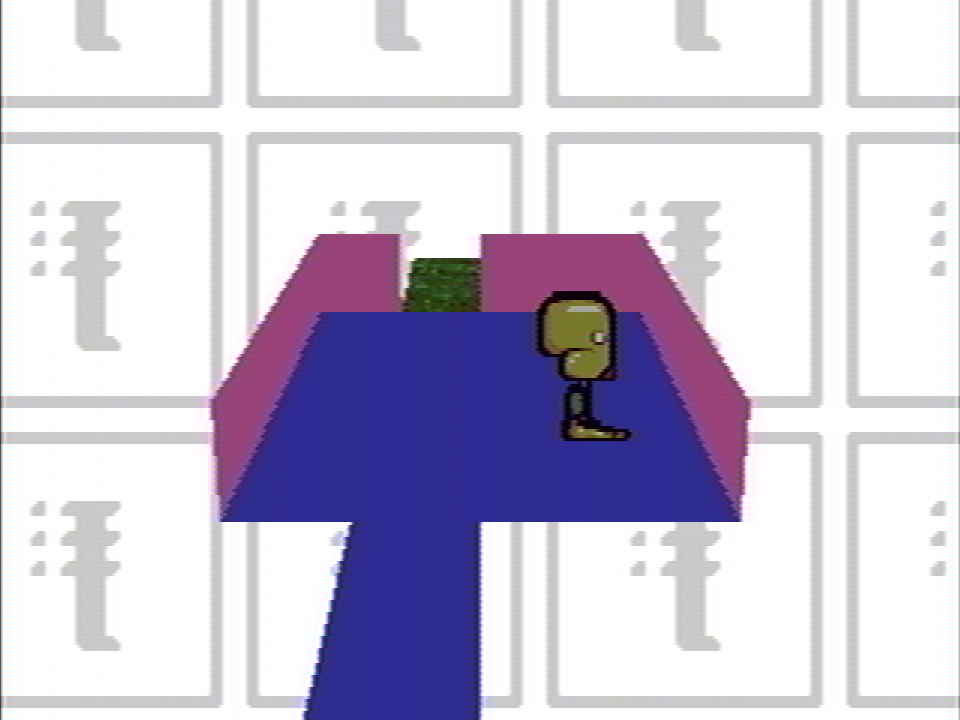
When you're ready to make an attempt, load your save file, and push the bucket against the closed door, pretending that it's open. Push it far enough that you would enter through the doorway. Next, move down and to the right, so that you reach the lower right corner of the room, avoiding the beds in the middle. Move up to reach the upper right corner of the room. The bucket will appear in the corner of the room, and a paint roller will appear, allowing you to paint the wall black.
The roller will move one tile at a time as you press buttons on the d-pad. The controls are similar to a menu, where pressing a button once will cause it to move one space, but holding the button down will not cause it to move continuously. Moving the roller downwards will cause it to paint the current tile. There are three columns of tiles which may be painted. Once you've finished painting the wall, a black key will appear from the bucket. Make sure to wait a little bit before leaving the room, so that you collect the key. Move down, left, up and then left again to exit the room. Next, you must use the key to unlock the door on the right side of the living room, and then enter the door.
At this point, you may use the pause menu to save and quit, and then wait for the recording to play. Demos are selected randomly, so the time before your most recent attempt is played may vary.
If successful, the recording will push the bucket into the room, and then navigate to the upper right corner, painting the wall and collecting the key. After that, it will exit the room, open to the locked door, and then enter the door. The screen will fade to black, and a chorus sound will play. The game will then restart, and the Garalina logo will be tilted counterclockwise.
November 12th
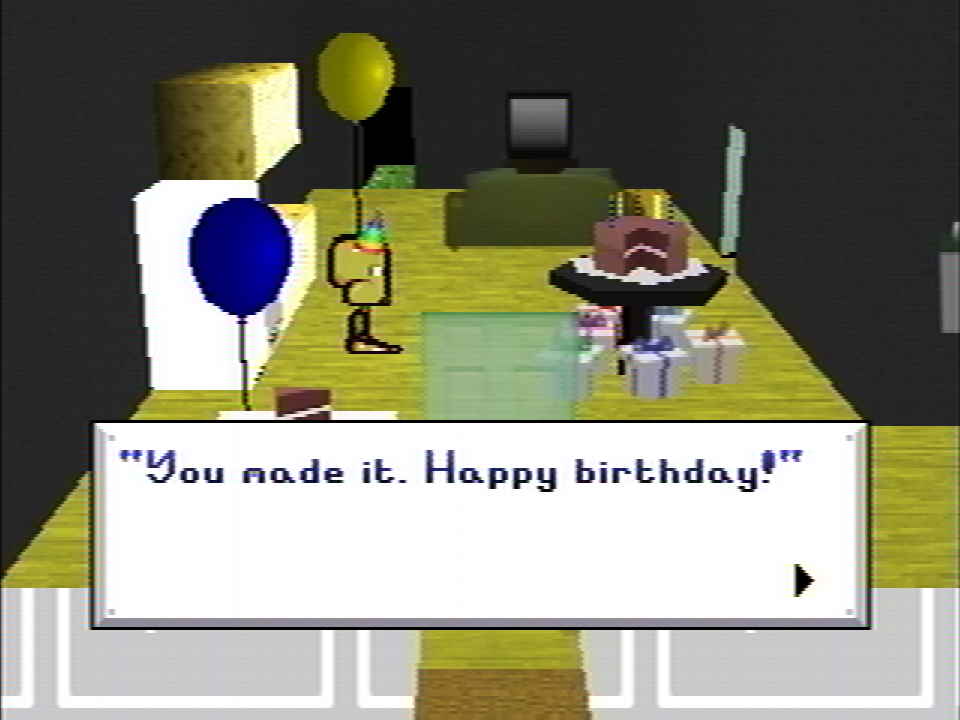 At this point in the game, the title screen will only show one save file, titled "Strange situation". Upon loading this file, the camera will be focused on the house, and you'll be placed offscreen to the right. Outside of the house, you'll see several signs with balloons attached to them, and arrows on the ground pointing to the house door.
Inside the house you'll find more birthday decorations, and several text boxes. The doors which were previously closed are now open.
Inside the bedroom where you painted the wall, you'll find several additional text boxes. NOTE: The game may freeze in this room, like in Petscop 14. Do not save here, otherwise your file may become softlocked.
Through the other door, you'll find a garage which has a computer inside of it. You may interact with the computer to view what's being displayed on the monitor.
Retracing Your Steps
Upon leaving the house, your movements will become inverted. Be careful not to inadvertently reenter the house, as this is very easy to do when your movement is inverted.
After some time has passed, a large text box will open, inquiring about what happened on November 11th of 1997, and asking you to retrace your steps.
From here, walk back to the windmill, so you can get back to the underground rooms. You can go back the way you came, walking diagonally Southeast, or down-right. Slightly more South than East. Like before, we recommend saving your game before leaving the house, in case you get lost. If you can't figure out how to get back to the windmill, try starting from the house, walking down for approximately 1 minute and 50 seconds, then right for approximately 56 seconds.
Optionally, as you're walking back, you may find another text box, discussing a girl who went missing. If this happens, you may walk in circles around the location you were standing when the text box appeared, and eventually a gray ask box will appear, like in Petscop 17.
Once you reach the windmill area, proceed through the trapdoor, and down the staircase. Return to the room with the road where the cars drive by. Proceed North along the road and through the tunnel.
This part takes a while; you'll need to walk along the road for approximately 25 minutes. Eventually, a chorus sound will begin playing. You'll appear in front of a school bench, and your movement will no longer be reversed.
Driving
Alternatively, you may return to the shed entrance to obtain the silhouette effect, then proceed onto the road to be hit by an orange car, like in Petscop 22. If you do this, the camera will eventually begin moving along the road. This will continue for about an hour (over twice as long as if you had walked) before you reach the school.
NOTE: If you use this method to reach the school, you will not be able to walk through the girl image and play a board game. Instead, proceed as if you had already completed the events on the second floor.
The rest of this walkthrough will assume that you walked.
The School
First Floor
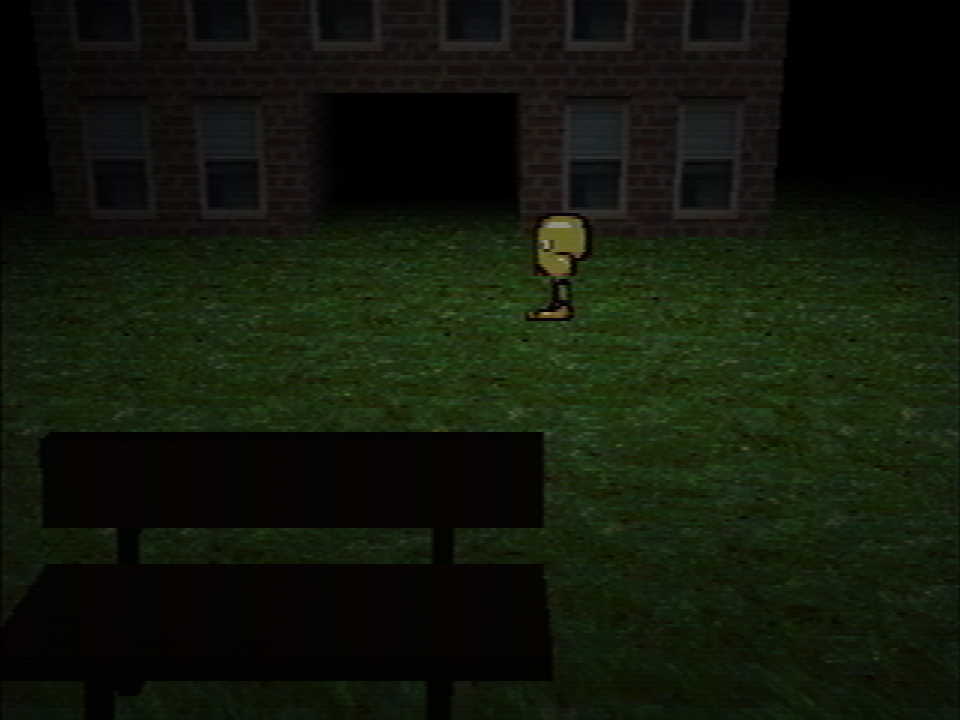
From the bench, just walk forward a little bit and you'll find the school building. Upon entering, you'll notice that the game controls differently here: Instead of the regular third-person controls, the school uses a first-person system. The left and right buttons will cause the camera to rotate, while up and down are used to walk forwards and backwards.
This first room can be difficult to navigate if you aren't familiar with it. Each side of the room contains a large open area with pieces, lockers along the walls, and windows on the furthest wall. One of the lockers on the West side has a lock which you may interact with. Near the Northwest corner of the room, you can find a door which leads to a side room. Near the Northeast corner, you can find a large dark passage, leading to the basement. Directly in front of the area you entered from, you can find a staircase which leads to the second floor. When you're ready to proceed, use the stairs to access the second floor.
Second Floor
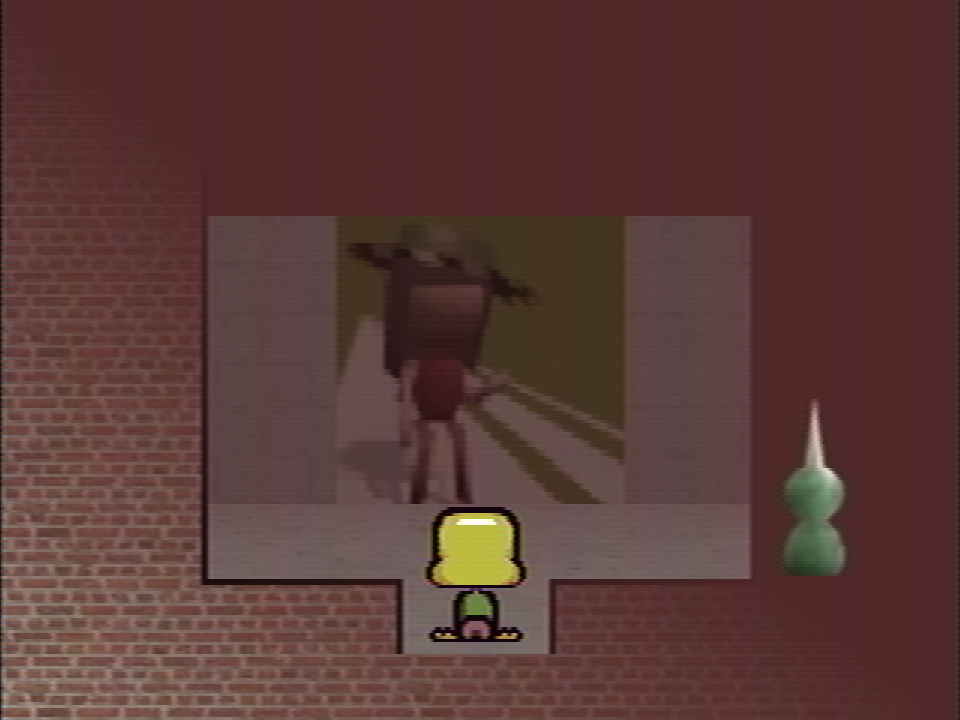 On the second floor, you'll find several hallways. If you try and walk too far, you'll get pulled back to a specific wall with an image of a girl wearing a hat. The girl image isn't actually a solid wall; you can walk through it to access another room.
After walking through, you'll be in an office containing some furniture, and a shelf with several board games on it. After some time has passed, a text box will appear, and you'll be asked to select a board game.
NOTE: As of the time of writing, only the Graverobber and Checker games have been implemented in Giftscop.
It doesn't matter which board game you select; Graverobber is what was selected in the original Petscop series.
Once you decide which game you want to play, it will begin, and several additional text boxes will appear throughout the game.
Graverobber is an original game created for the Petscop series. The game functions similar to Battleship, in that each player places several pieces on their respective sides, and must attempt to locate said pieces on the opposing player's side. In the case of Graverobber, you must locate the other player's graves and dig the adjacent dirt tile.
What's unique about Graverobber is that your position on your own board may differ from your position on the other player's board. This will happen if you attempt to move through an area which is traversable on your board, but blocked on the opponent's board.
On each turn, you may either move your piece, dig a tile adjacent to your location, or skip your turn. You're also able to record information about the board, by editing a grid which appears above your board.
If your position becomes desynced between the two boards, digging will allow you to determine your position on the other board, by adding a brown tile on the recording grid.
Checkers functions the same as the real-world checkers game. The goal is to capture all of your opponent's pieces, by jumping over them using your own pieces. Each piece can only move diagonally forwards at first. If one reaches the opposite side of the board, it will be crowned, allowing it to move in either direction.
Regardless of which game you pick, it doesn't actually matter whether you win or not.
After the game ends, you may leave. You won't be pulled back to the girl image anymore, so you're now free to collect the 30 pieces in the room.
By this point, you should have at least 474 pieces.
When you're ready to move on, return to the first floor, and enter the dark passage in the corner. This will take you to the basement stairs.
From there, enter the doorway on the side of the room.
NOTE: This portion of the game is left very ambiguous within the original series. It's unknown what happens directly after the player enters this path. For Giftscop, we've implemented it such that it leads directly to later portions of the game, but this may not be the "canon" way that this part of the game is meant to function.
After walking far enough into the doorway, a chorus sound will begin playing.
Third Floor
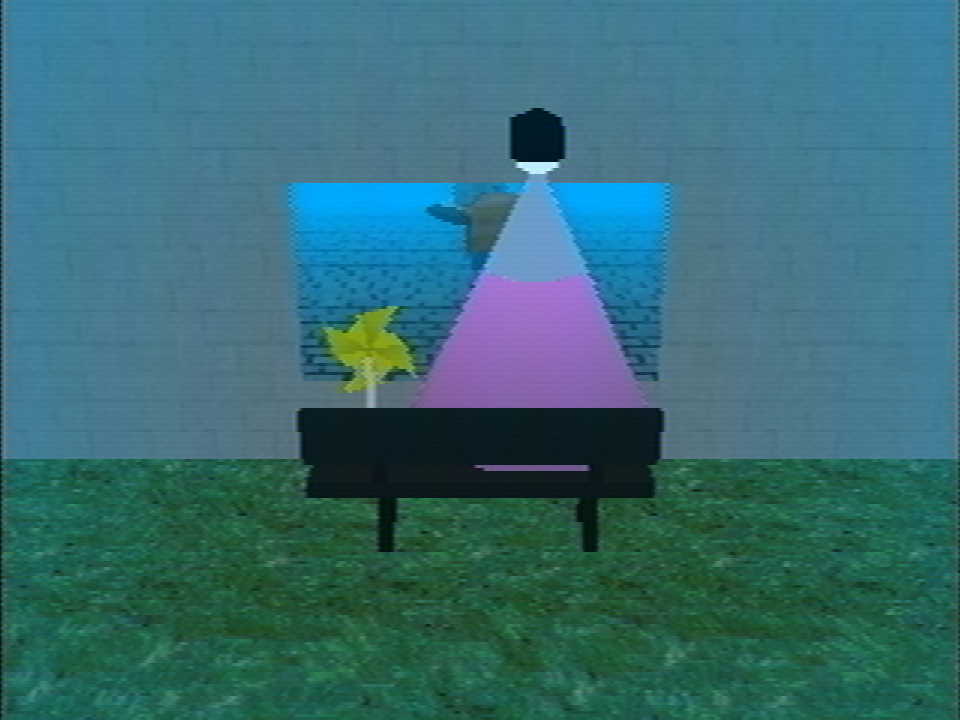
The school's third floor contains several computers, a game console in the center, and a large jittering cone with pieces hovering around it.
Press square to control the green tool, move it over the jittering object, and press . The screen will fade to black, and you will obtain 26 pieces.
Now, you should have at least 500 pieces. If you have fewer than 500, you may have missed some in a previous location.
After this, the room will fade back in, but it will be significantly darker, and all of the monitors will be turned off, except for the one in the center.
Basement

Go to the first floor, and proceed into the dark passage in the corner. When you reach the stairs room, proceed through the doorway in the center.
The basement contains a large hole in the middle, along with several pushable objects. On the left wall is a closed closet door.
The objects in the room may be pushed into the hole. Push the photograph into the hole, and then the closet door will open. Inside, you'll find Care B. Catch her, and then enter the passage on the North wall when you're ready to proceed.
The next room contains a machine, built out of several cylindrical objects. The green tool will appear above the guardian.
If you freed Tiara from the quitter's room, one side of the machine should already have pieces hovering around it. If this is not the case, you will need to backtrack and ensure that Tiara has been freed.
This next part requires 500 pieces. If you don't have enough, then you must have missed some at an earlier point in the game, in which case you will need to backtrack and collect them.
Approach the side of the machine without pieces, and the screen will fade to black. Your piece counter will appear, and begin depleting to zero. When the room fades back in, you'll see that your pieces have been added to the machine, and the green tool has disappeared.
Once both sides of the machine have pieces, stand directly in front of the opening in the central wheel. Open the pause menu and select the Pets section. The prompt which normally reads "select pet" should now say "drop". Drop Care B, and a text box reading "spin when ready" will appear. Interact with the wheel, and it will close.
After several seconds, a Needles Piano will appear in the center of the room, which you may pick up.
If you have a MIDI keyboard, you may use it to play the Needles Piano. Alternatively, you may switch input modes (controlled by Tab by default) to play it using your computer's keyboard.
Play the Needles Piano until the notes begin to sound reverberated. At this point, you may open the machine again, and Care B will be replaced by an egg, which can be caught.
Leave the basement, and proceed back to the first floor. Navigate to the locker with the padlock, and enter the following code: 9-2-19. For each number, rotate the dial so the number is directly below the arrow at the top of the lock, and then press to enter the number. Repeat this for each of the digits in the code. Once the code is entered correctly, the locker will open. After this, open the pause menu, select Pets and drop the egg.
Leave the school and approach the bench. The lighting will change, and you will be returned to the title screen.
You may load your save file again to access the room from the end of the soundtrack video. This is the end of the game.